25 November 2008

WHERE I GREW UP

This past summer I was able to make a trip home with my whole family.  I did not realize how much I missed being in Oregon / Washington until I got to bring my girls home.  We currently live in Florida where the beaches are supposed to be some of the most beautiful, yet I have never really enjoyed spending time on the beaches here.  They are beautiful, but not what I grew up with.  I grew up where the beaches meet evergreen covered cliffs, where the sand and river rock mingle and where icy cold creeks run out into the ocean.  I grew up playing on one particular beach where all these things came together.  My dad would drive an hour and a half from our house in Longview, Wa; to Ecola State Park in Cannon Beach, Or.  We would get to the beach and hike down a trail that would lead us over a small wooden bridge that crossed the creek, climb over the huge trees that had washed ashore and throw the river rocks at the cliffs as we made our way down to the sandy beach.  

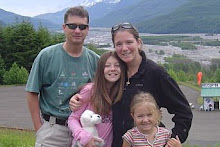
Here are some photos from our visit home.

HAYSTACK ROCK & OREGON COAST


INDIAN BEACH AT ECOLA STATE PARK


HAYSTACK ROCK IN CANNON BEACH, OR


THE OREGON COAST.


19 November 2008

EXPANDING FILE FOLDER

I found an incredible site for crafting ideas and instructions called The Scrapbook Lounge! The instructions for this file folder is in the episode archives.  The title is EXPANDING MEMORIES by Tricia Morris seen on July 4th, 2008.

I used the DESIGNER SERIES PAPER ~ BELLA ROSE, TEXTURED CHOCOLATE CHIP CARD STOCK, SCALLOP EDGE PUNCH, BUILD A BRAD, SCALLOP CIRCLE PUNCH, 1" CIRCLE PUNCH AND 3/4" CIRCLE PUNCH.  I also used a magnetic purse clasp from the local craft store for the closure.  I used SNAIL adhesive for a few sections of this project and would recommend using STICKY STRIP instead.  Have fun!

FRONT VIEW


SIDE VIEW


BACK VIEW


INSIDE VIEW


VIEW FROM THE TOP


18 November 2008

THREE MORE AWESOME CARDS FROM LISA C'S CLASS

WONDERFUL YOU


UNDER THE STARS


PUN FUN


17 November 2008

WHY I LOVE GOING TO LISA C'S CARD CLASS

There is this day, this one awesome day every month, that I look forward too with much glee and anticipation.  The second Thursday of the month, I get up early, get the girls to school in a timely manner, guzzle down my coffee and jump in the car to go sit in a stampers paradise with my friends.  My friend Lisa has such an awesome class!  I truly look forward to this one card making day!

Sitting around a table with my girlfriends Judy and Carolyne, I get to create cards and laugh until my stomach hurts for three solid hours.  I will miss this class and this time with my friends more than I can express in this moment!

CAROLYNE'S CARD
~ we swap cards sometimes~


CAROLYNE'S CARD


OWL TOGETHER NOW


INSPIRED BY NATURE


HAPPINESS ALWAYS


HAPPINESS ALWAYS


FRESH CUTS


IF THE HALO FITS


FUN & FAST NOTES


A BEAUTIFUL THING


15 November 2008


HAWAII INK'S SURPRISE

My dear friends and fellow Stampin' UP! demonstrators conspired against me and totally surprised me with a great going away dinner at a local restaurant.  I walked into the restaurant thinking I was going to talk to my supervisor about my plans for our next duty station and was stunned to see some really good friends gathered around a table waiting for me.  We shared a really great night chatting and having fun!

My friend Alice from A Paper Angel blog made me this awesome card that also has a great ornament attached.  Alice is super creative and pays great attention to detail.  I have yet to see something she has made that I haven't wanted to re-create.

My Supervisor Lisa C. gave me this great card as well as the rockin clipboard below.  I love the DESIGNER SERIES PAPER that was used on the card (it's retired).

AWESOME CLIPBOARD
made by LISA C.


My friend Whitney was the sneaky one who planned this surprise for me. Whit has an awesome studio that I go and work in quite a bit.  She is always busy making something new and I am always taking photos so I can remember what she has done.  You can see her work on Whitney's Stampin Studio

GIFT BOX WITH WRAPPED CHOCOLATES

made by Whitney using the SCALLOP ENVELOPE BIGZ DIE


NOTEBOOK TIN

Okay, this is the coolest thing ever!  Whitney recently taught a class about embossing aluminum tins, how cool!  You use the EMBOSSING BUDDY to take the static away from the container so the embossing powder will only stick to the stamped image.  Stamp the image with VERSAMARK and then coat with EMBOSSING POWDER of choice.  Use the HEAT TOOL to magically transform the image from powder to a shiny embossed surface.  SOOO COOL!

INSIDE VIEW OF NOTE TIN


WRAP AROUND CARD USING LARGE SCALLOPED CIRCLE DIE

Made by Whitney


I LOVE MY STAMPIN' UP! GROUP!!!


SWAROVSKI GIFT EARRINGS


~SUPPLIES NEEDED~
Needle nosed pliers
Roundnose pliers
wire cutters

2 brass Earring wires
2 2" brass head pins.
2 4 mm cube ~ emerald
2 6 mm cube ~ crystal
2 8 mm cube ~ siam
2 10 mm flower ~ marguerite
2 brass bow beads

~CREATING THE GIFT EARRINGS~

Take the 2" head pin and place the beads in this order:
8 mm cube - siam, 6 mm cube ~ crystal, 4 mm cube ~ emerald and brass bow bead.  Secure with wrapped loop (instructions on snowman post).

Attach earring wires to the gift's loop.

SWAROVSKI CHRISTMAS TREE EARRINGS


~SUPPLIES NEEDED~
Needle nosed pliers
Roundnose pliers
wire cutters

2 Sterling Silver Earring wires
2 2" Sterling Silver head pins.
2 4 mm bicone ~ siam
2 6 mm flower ~ marguerite
2 8 mm flower ~ marguerite
2 10 mm flower ~ marguerite
2 12 mm flower ~ marguerite
2 4 mm cube ~ emerald

~CREATING THE CHRISTMAS TREES~

Take the 2" head pin and place the beads in this order:
4 mm cube ~ emerald, 12 mm flower ~ marguerite, 10 mm flower ~ marguerite, 8 mm flower ~ marguerite, 6 mm flower ~ marguerite and 4 mm bicone ~ siam.  Secure with wrapped loop (instructions on snowman post).

Attach earring wires to the christmas tree's loop.

SWAROVSKI SNOWMAN EARRINGS


SUPPLIES NEEDED~

Needle nosed pliers
Roundnose pliers
wire cutters

2 Sterling Silver Earring wires
2 2" Sterling Silver head pins.
2 8 mm round faceted ~ white opal
2 6 mm rondelle ~ siam
2 6 mm round faceted ~ white opal
2 4 mm rondelle ~ jet
2 4 mm cube ~ jet


CREATING SNOWMAN~

Take the 2" head pin and place the beads in this order:

  8 mm round faceted ~white opal, 6 mm rondelle ~ siam, 6 mm round faceted ~ white opal, 4 mm rondelle ~ jet, and 4 mm cube ~ jet.  Secure with wrapped loop (instructions below).

Attach earring wires to the Snowman's loop.

WRAPPED LOOP INSTRUCTIONS~

(FROM BEAD & BUTTON)

With the tip of the needle nose pliers, grasp the wire directly above the bead.  Bend the wire (above the wires) into a right angle.  Using round nose pliers, position the jaws vertically in the bend.  Bring the wire over the top jaw of roundnose pliers.  Keep the jaws vertical and reposition the pliers so the lower jaw fits snugly in the loop.  Curve the wire downward around the bottom of the roundnose pliers.  This is the first half of a wrapped loop.  Position the jaws of your needle-nose pliers across the loop.  Wrap the wire around the wire stem, covering the stem between the loop and the bead.  Trim the excess wire and gently press the cut end close enough to the wraps with the needle-nose pliers.
SWAROVSKI SANTA CLAUS EARRINGS

I made these earrings last year to help raise funds for Relay for Life.


SUPPLIES NEEDED~

Needle nosed pliers
Roundnose pliers
wire cutters

2 Sterling Silver Earring wires
2 2" Sterling Silver head pins
4 1 1/2" Sterling Silver head pins
2 6 mm Swarovski rondelle with black crystals
2 6 mm Swarovski faceted round siam beads
2 8 mm Swarovski faceted round siam beads
6 3 mm Swarovski bicone siam beads
4 mm Swarovski rondelle crystal ab
2 4 mm Swarovski faceted round light rose
3 mm White seed beads (hands & hat topper)
2 3 mm Crystal seed beads (on very bottom)

CREATING THE ARMS~

Take the 4 (1 1/2") head pins ~ on each head pin, layer one white seed bead and one 3 mm bicone siam. Secure with wrapped loop on head pin. (loop instructions below)

CREATING SANTA~

Take the 2" head pin and place the beads and arms on the head pin in this order.  Crystal seed bead, 6 mm rondelle ~ black, 6 mm faceted round bead ~ siam, 8 mm faceted round bead ~ siam, two arms, 4 mm rondelle ~  crystal AB, 6 mm faceted round bead ~ light pink, 4 mm rondelle ~ crystal AB, 3 mm bicone ~ siam, white seed bead.  Secure with wrapped loop.

Attach earring wires by bending loop back enough to slide the loop above Santa's hat on and then bend the wire back.

WRAPPED LOOP INSTRUCTIONS~

(FROM BEAD & BUTTON)

With the tip of the needle nose pliers, grasp the wire directly above the bead.  Bend the wire (above the wires) into a right angle.  Using round nose pliers, position the jaws vertically in the bend.  Bring the wire over the top jaw of roundnose pliers.  Keep the jaws vertical and reposition the pliers so the lower jaw fits snugly in the loop.  Curve the wire downward around the bottom of the roundnose pliers.  This is the first half of a wrapped loop.  Position the jaws of your needle-nose pliers across the loop.  Wrap the wire around the wire stem, covering the stem between the loop and the bead.  Trim the excess wire and gently press the cut end close enough to the wraps with the needle-nose pliers.

14 November 2008

HOLIDAY WEEKEND

Tampa Bay Sea Cadets getting ready for the Veterans Day parade.  These Sea Cadets are awesome!  Shelby was the smallest of the group in the parade (she is in the black pants).  They did an outstanding job in the parade, it was super hot outside and not once did the cadets complain.


EOD (EXPLOSIVE ORDNANCE DISPOSAL) TRAINING

  The cadets were so lucky to be able to attend an EOD demonstration on the Air Force Base.  Not only did the cadets get to try on the complete bomb suit, they got to watch a robot demonstration and they got to try out the Segway.  The EOD unit on the base did an awesome job showing these cadets what EOD was about. 

Shelby learned how to operate the Segway. 


10 November 2008

I WISH ~ COLLECTION CONTINUED

NUGGET PURSE


INSTRUCTIONS~

Cut Card Stock to 5" x 1-1/2"
Score at 1-1/2", 2-1/4"& 4".

Round corners on the shortest end.

Cut DESIGNER SERIES PAPER into a 5-1/8" x 1/4" strip.  Use STICKY STRIP to adhere to card stock.  

Using the 1/16" CIRCLE PUNCH, punch holes on the 1-1/2" score line at 1/4" from each end.  Cut a piece of 1/4" GROSGRAIN RIBBON to 7-1/2".  Thread through the holes to create the handle.

Use the 1/16" CIRCLE PUNCH to punch through sticker accent, and the front two layers of the purse.  Use SILVER BRAD to secure the purse layers together.  Use a piece of STICKY STRIP to secure a Hershey's nugget to the bottom of the purse.

MINI POST-IT NOTE KEY CHAIN


LARGE POST-IT NOTE COVER

INSTRUCTIONS~

Measure the notepad for dimensions.   I measured the height of the stack of notes and added just a little bit more length to adjust for the score lines.  I also added about 1/16" to each end to ensure the post it pad would be completely covered.  You can see on my larger notepad that a bit of the paper shows up because I didn't plan on the score lines taking away from the measurements.

ALTERED NOTEPAD

INSTRUCTIONS~

Measure notepad to be covered (make sure to measure the height of the notepad).  Apply STICKY STRIP to the edge and along the spine  on the front and back cover as well as applying a strip to the spine itself.  Starting on one edge, line up the DESIGNER SERIES PAPER with the edge and very carefully attach to the notepad.  Work your way to the other edge one line of STICKY STRIP at a time.  Using the opposite side of the DESIGNER SERIES PAPER  measure it to have an inch on each side of the notebook.  Use STICKY STRIP on each end and on the spine of the notebook.  I used the sticker accents from the I WISH SIMPLY SCRAPPIN' KIT to embellish.

07 November 2008

I WISH ~ CHRISTMAS ORNAMENTS


These are too darn cute! Using the DESIGNER SERIES PAPERS from the I WISH SIMPLY SCRAPPIN' KIT I made the large ornament using 11 scalloped circles and the small ornament is made with 10 rounded tabs.  Fold in half (alternating colors) and score.  Use the SNAIL to adhere the panels together.  I did run STICKY STRIP along the center to help keep the ornaments together.  I also used STICKY STRIP on the 1/4" Real Red Grosgrain Ribbon loop.  The small ornament has a round sticker embellishment (with silver brad) from the I WISH SIMPLY SCRAPPIN' KIT adhered to the ornament using a STAMPIN' DIMENSIONAL.
I WISH ~ Notebook

I saw this notebook on quite a few different blogs this past summer.  I know the notebook is not a new thing for many people, but I think it is such a great beginners project.  I have made these for teacher gifts as well as bonus prizes during my card classes.

Cut Card Stock to: 7 5/8" x 5 1/4"
Score at 3 1/4", 3 5/8" and 4".

Make a cut 1 1/2" up from the side on both sides as shown in the photo below.  Apply the sticky strip where indicated and fold towards the bigger panel.  A standard 3" x 5" notepad from your local office supply store or grocery store fits perfectly.  I use sticky strip to adhere the notepad.

Decorate the cover ~


Supplies needed ~

Card Stock: Whisper White

Accessories:

Designer Series Paper & Embellishments  from I WISH SIMPLY SCRAPPIN' KIT
Sticky Strip
1/16" Circle Punch
Silver Brad
I WISH ~ 


I tried using the gigantic star sticker that is in the I WISH kit ten different ways and either it was too big or it just didn't look right.  I got to thinking about the points of the stars and came up with the idea of making them Christmas Trees.  

All materials used to make this card aside from the Whisper White card stock are from the I WISH SIMPLY SCRAPPIN' KIT.  I made the tree trunks from the border of one of the square Chocolate Chip stickers.  

To make this card ~ 

Stamp Set: Snow Swirled
Card Stock: Whisper White
Ink: Old Olive, Real Red

Accessories:

Designer Series Paper from I WISH kit
Border Stickers from long sticker pages
Textured Card Stock from I WISH kit


06 November 2008

SIMPLY SCRAPPIN' PAGES

I WISH . . . 

All materials are from the I WISH SIMPLY SCRAPPIN' KIT ~ I WISH.

I used STICKY STRIP to adhere the ribbon to the page.

First set of pages ~


Second set of pages~

This is my favorite of the three sets!


And the third set ~


I WISH SCRAPPIN' KIT CONTINUED

4 projects made so far!

GIFT CARD HOLDER


It was my goal to draw out a template to use as a guide line for making this gift card holder.
So here is my first attempt with this pattern.


Cut CARD STOCK to 10 7/8" x 2 3/4".
Score at 3 3/4", 4", 7 7/8" & 8 1/8".  


Cut 2 pieces of DESIGNER SERIES PAPER to 3 3/4" x 6"
Score at 2" & 4 1/2", turn and score at 1/4".


Use the 1 1/4" CIRCLE PUNCH to punch out a half circle from top/front of both pockets.  Remove the two outside corners as shown in photo below.


Fold pocket with longer side tucked in.  Use SNAIL to glue together.
SNAIL pockets together, seam to seam.


Adhere DESIGNER SERIES PAPER pockets into gift card holder using STICKY STRIP.


Apply 4 STAMPIN' DIMENSIONALS to the front flap of the gift card holder.


Cut three coordinating colored CARD STOCK pieces to apply to the front of the holder using the STAMPIN' DIMENSIONALS already in place.

Whisper White ~ 2 1/2" x 3 1/2"
Chocolate Chip ~ 2 3/8" x 3 3/8"
Old Olive ~ 2 1/4" x 3 1/4"


To open and close the holder, the smaller panel  folds in between the larger panel and the card front.  


This is what it should look like from the side.


Aside from the Chocolate Chip CARD STOCK (the textured card stock is not stiff enough to hold the holder together properly) I used for the base of the project, every item used was from the I WISH SCRAPPIN' KIT.